Renting an instance
This guide walks you through deploying a GPU instance on Fluence. GPU Cloud supports three workload types — containers, VMs, and bare metal — each covered below. For background on workload types, instance lifecycle, and how billing works, see the GPU Cloud concepts.
When you deploy, the system reserves 3 hours of rent from your account balance — one hour is charged immediately, the other two are kept as a reserve. Make sure your balance has enough funds before starting. See billing model for details.
GPU container
GPU containers are lightweight deployments that run containerized workloads with full GPU access. They are ideal for running ML inference, training jobs, or any GPU-accelerated application packaged as a container image.
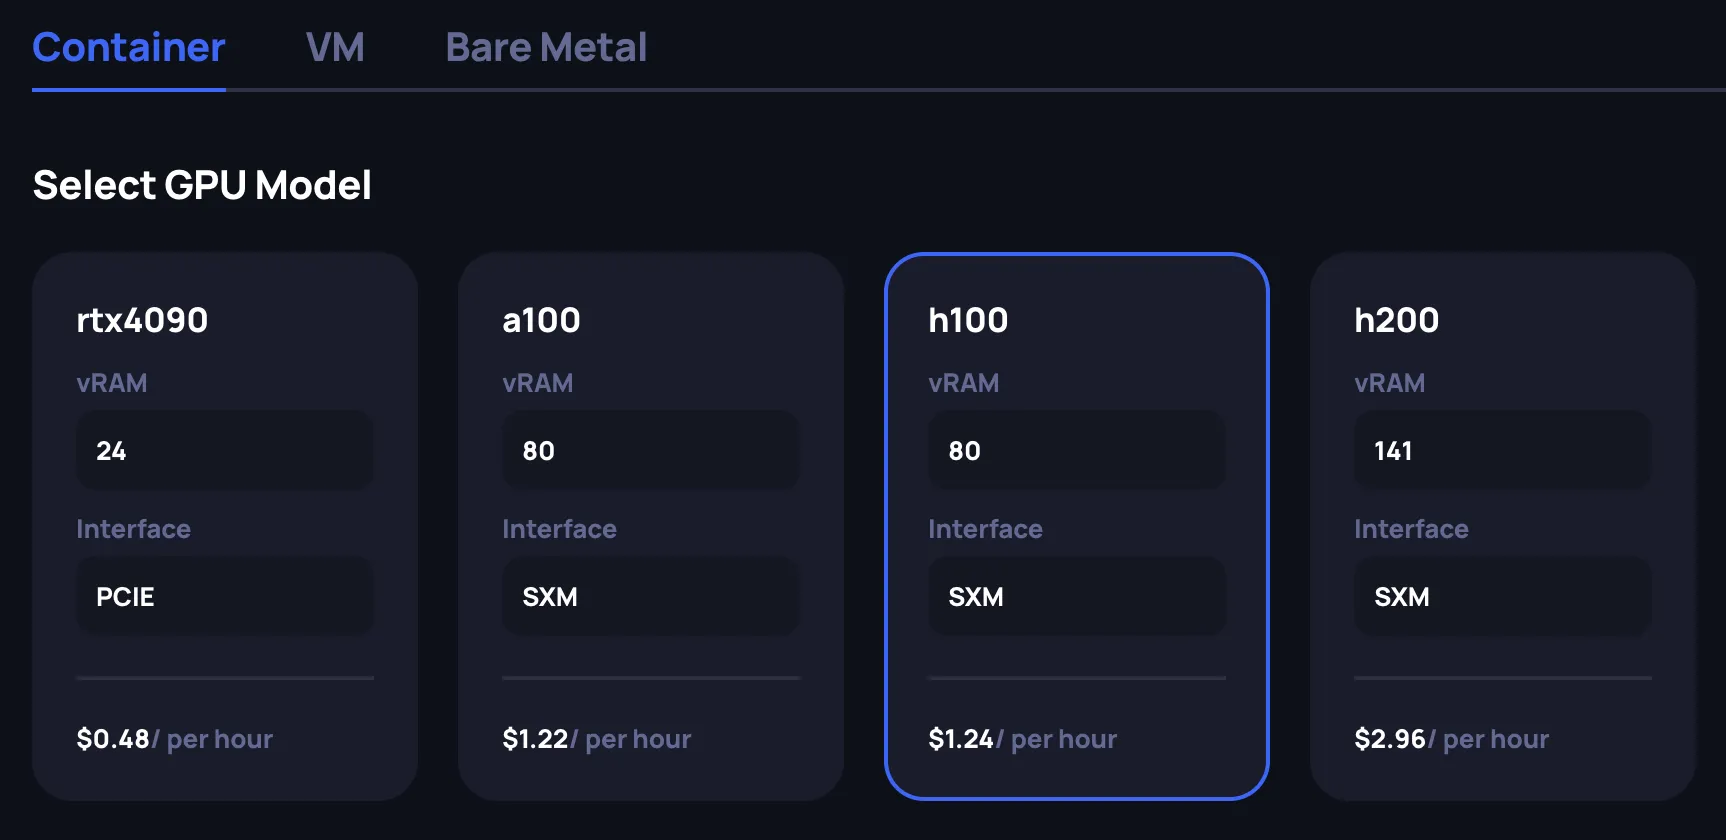
Select the GPU model
Choose the GPU model that fits your workload requirements. Each GPU card displays key specifications:
- vRAM: GPU memory available
- Interface: Connection type (PCIe or SXM — SXM offers higher memory bandwidth for multi-GPU workloads)
- Price: Minimum hourly rate in USD across all available configurations for this GPU model
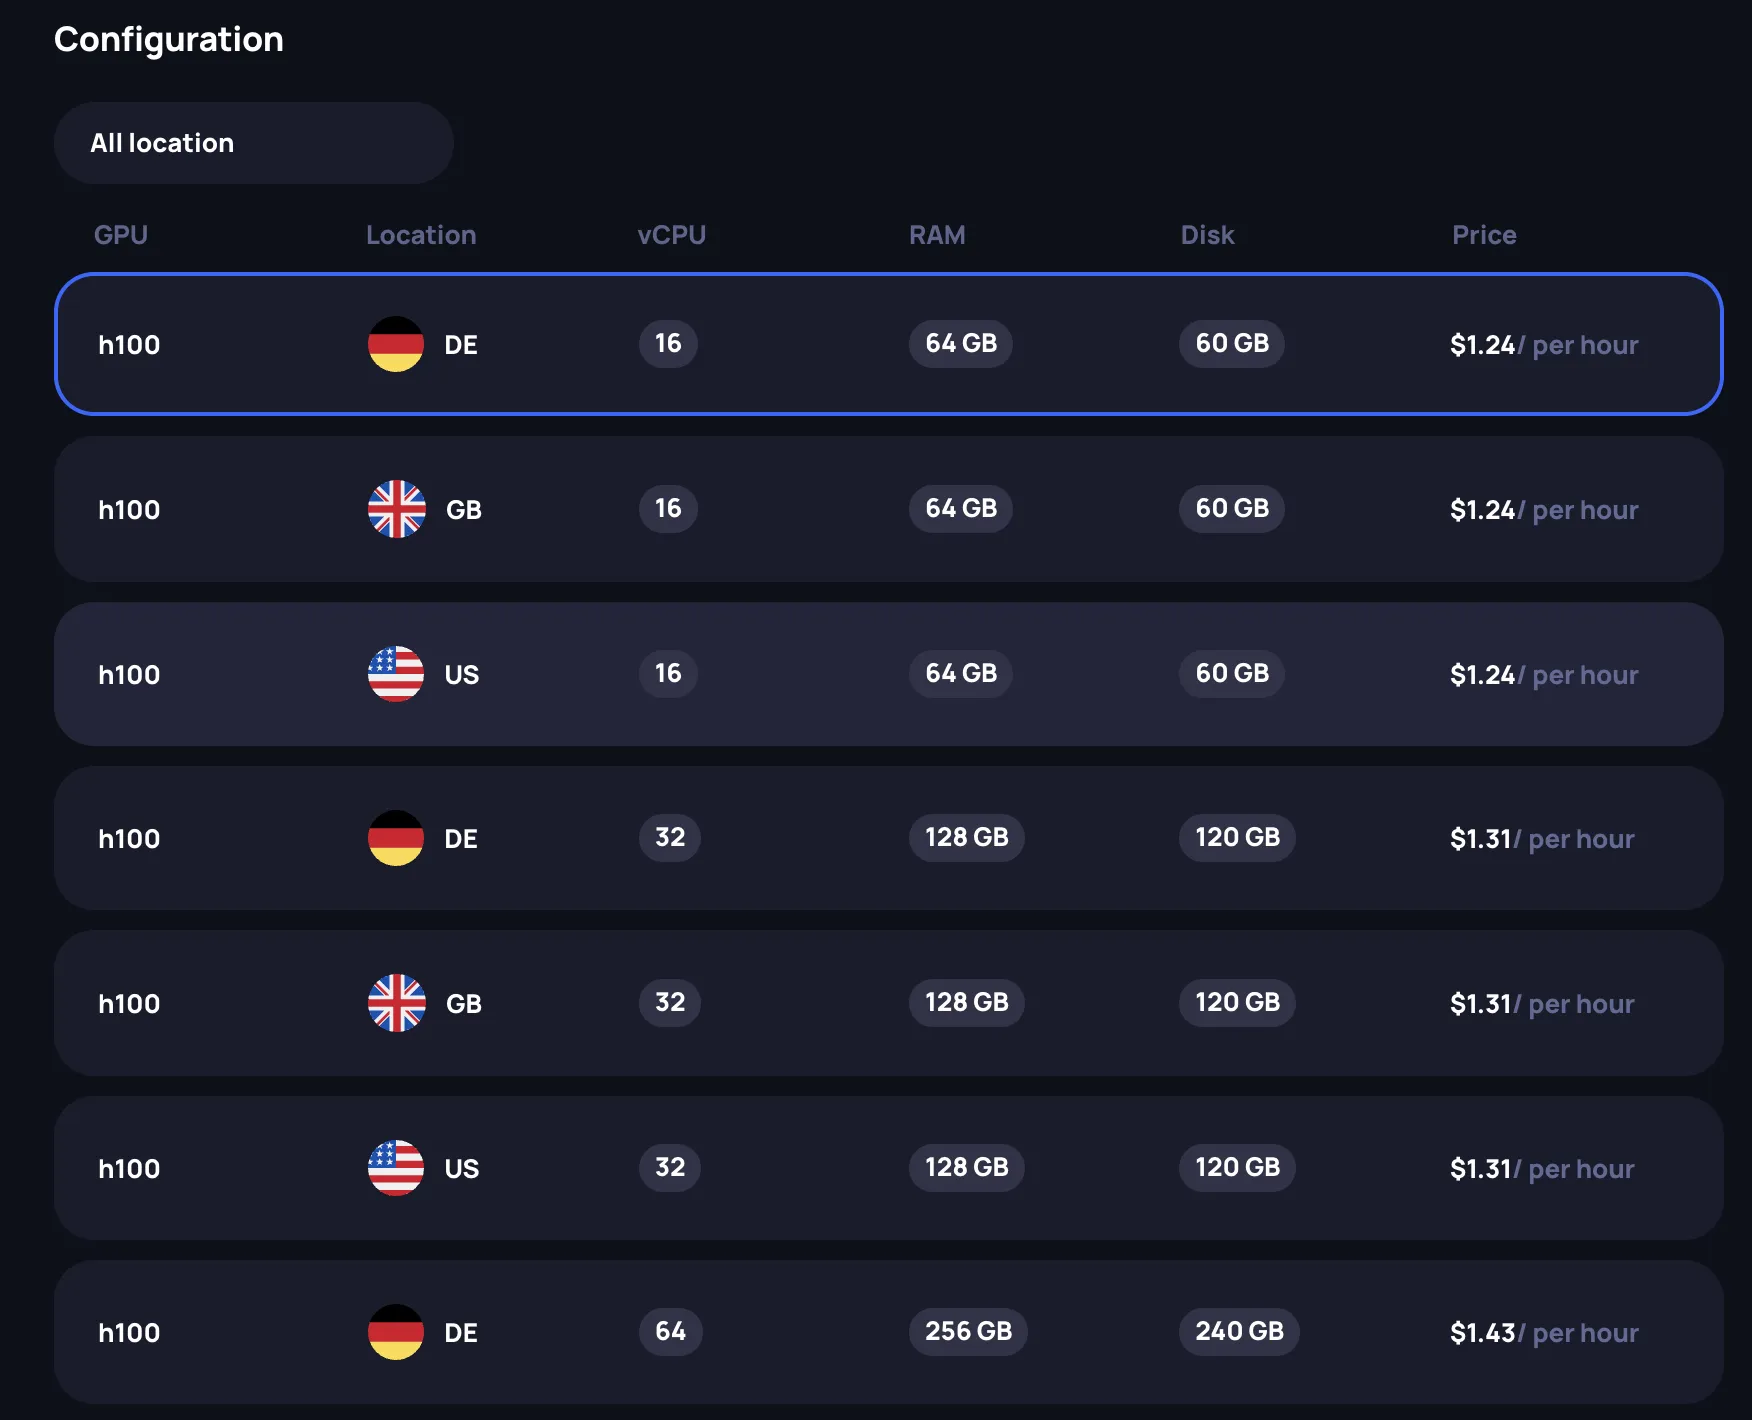
Select a configuration
After selecting a GPU model, choose a specific configuration from the available offerings. You can filter by location using the dropdown. Each configuration has following attributes:
- GPU: The GPU model
- Location: Data center location (US, GB, DE, etc.)
- vCPU: Number of virtual CPU cores allocated
- RAM: System memory allocated
- Disk: Storage space allocated
- Price: Hourly rate
Select the row that matches your requirements. The Review panel on the right updates to reflect your selection.
Specify the instance name
In the Configure deployment section, provide a name for your instance in the Basic Information field. A random name is generated by default, but you can customize it.

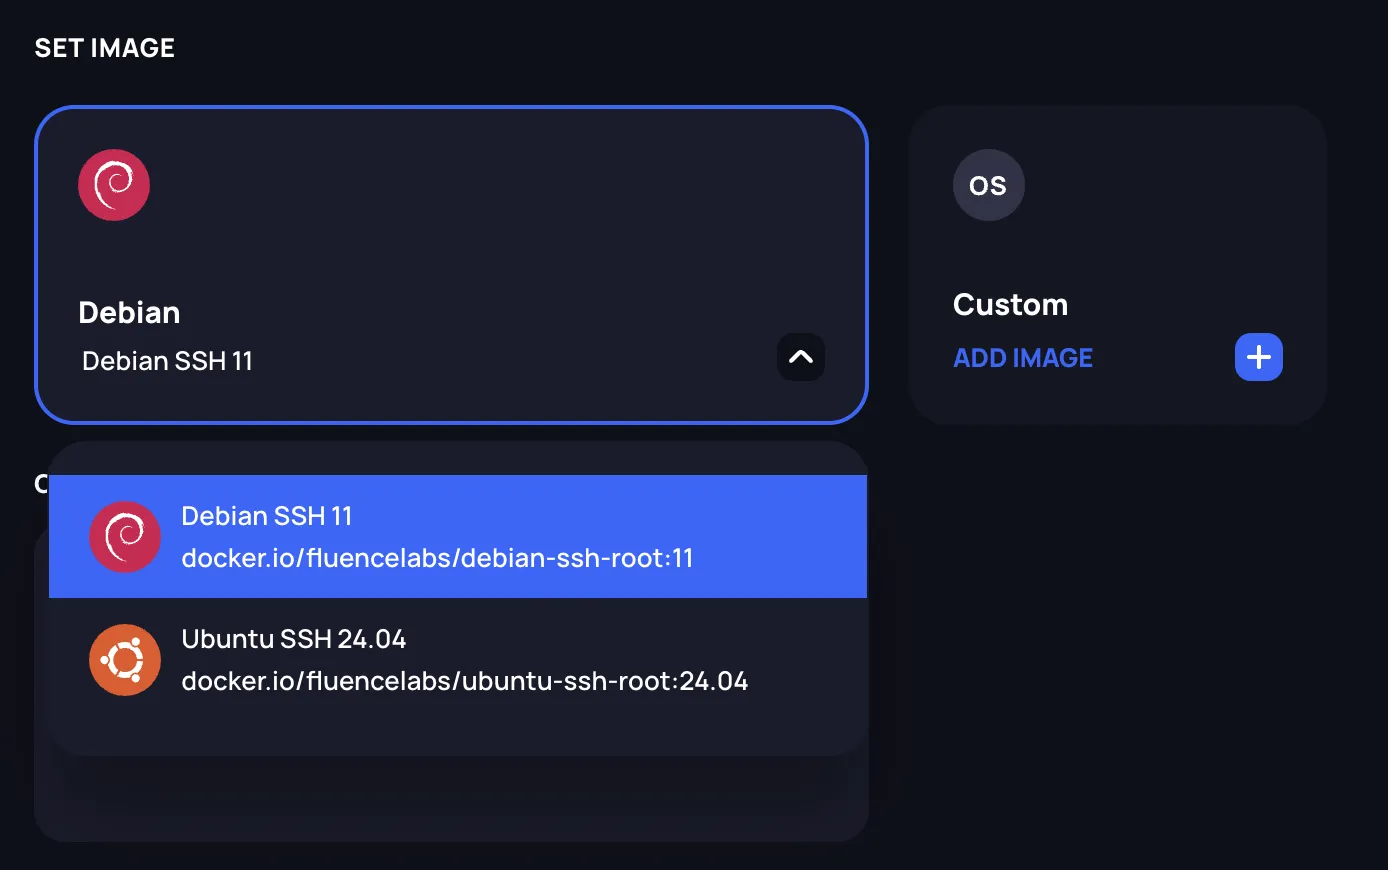
Set the container image
Choose the container image for your deployment. You have two options:
Predefined images: Select from available pre-configured images using the dropdown.
Custom images: Click Add Image to specify your own container image from a registry.
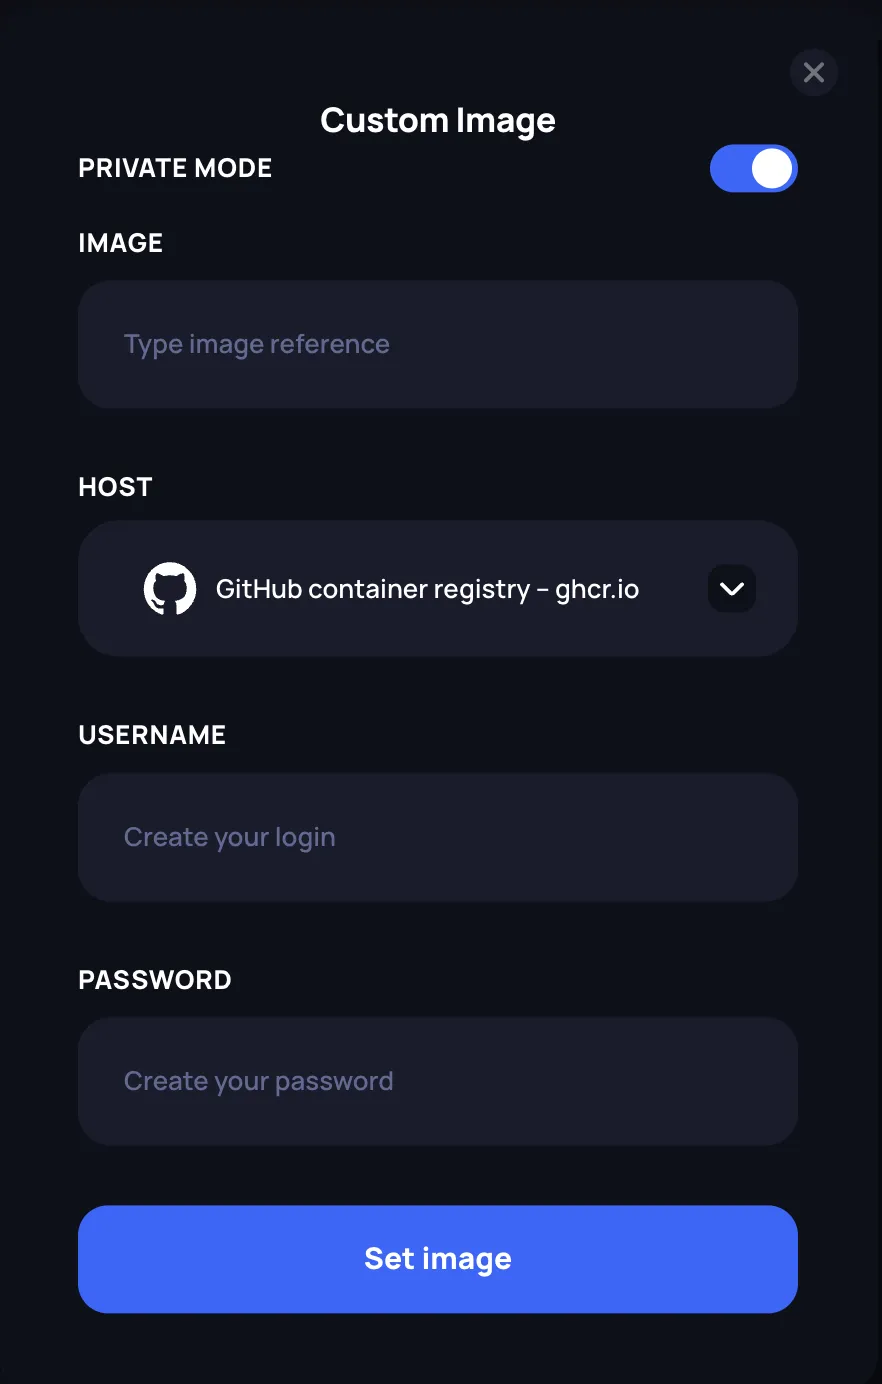
Using a custom image
When adding a custom image, a dialog appears with the following options:
- Image: Enter the full image reference (e.g.,
myorg/myimage:latest) - Private Mode: Enable this toggle to access private repositories. When enabled, additional fields appear:
- Host: Select the container registry (GitHub Container Registry or Docker Hub)
- Username: Your registry username
- Password: Your registry password or access token
Click Set image to confirm your selection.
Set the container start command
In the Container Start Command field, enter the script that will be executed as the entrypoint when the container starts. The script should be written as a bash script. Leave empty to use the default entrypoint defined in the container image.

Configure ports
Specify which ports should be accessible on your container. Enter port numbers separated by commas. Supported formats:
- Port number only:
22, 443(defaults to TCP) - Port with protocol:
8080/tcp,53/udp - Port ranges:
5000-5005
Port 22 is included by default for SSH access. Check Enable http on port 80 to expose HTTP traffic on port 80.

Set environment variables
Add environment variables that will be available inside your container. Click Add Variable and provide:
- Name: The variable name (e.g.,
MODEL_PATH) - Value: The variable value (e.g.,
/models/llama)
You can add multiple variables as needed. Click the X button to remove a variable.

Select SSH keys
Choose which SSH keys should have access to the container. Your registered keys are displayed, and you can select or deselect them. Click Add New Key to register a new SSH key if needed.
When using a predefined OS image, the environment variable SSH_PUBKEY is reserved by the system for injecting your selected SSH keys into the container. Defining an environment variable with this name will cause the deployment request to fail.

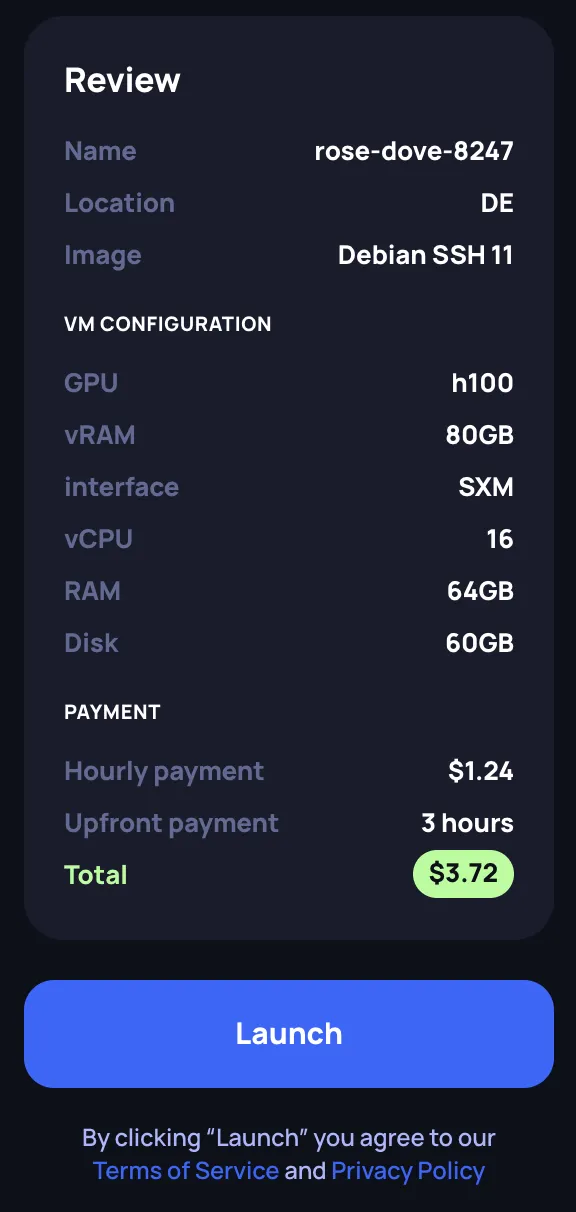
Review and launch
Review your configuration in the Review panel on the right side. Verify:
- Instance name and location
- Selected image
- Hardware configuration (GPU, vRAM, interface, vCPU, RAM, Disk)
- Payment details (hourly rate, upfront payment of 3 hours, total)
Click Launch to deploy your GPU container. You will be redirected to the Instances page where you can monitor the deployment status.
VM and Bare Metal
GPU VMs and bare metal instances provide full OS-level access with GPU passthrough. VMs run on a hypervisor, while bare metal gives you a dedicated physical server with no virtualization overhead. Both types share the same creation flow — the only difference is the tab you select at the top of the page (VM or Bare Metal).
The steps below apply to both VM and bare metal deployments. The screenshots show the VM tab, but the bare metal flow is identical.
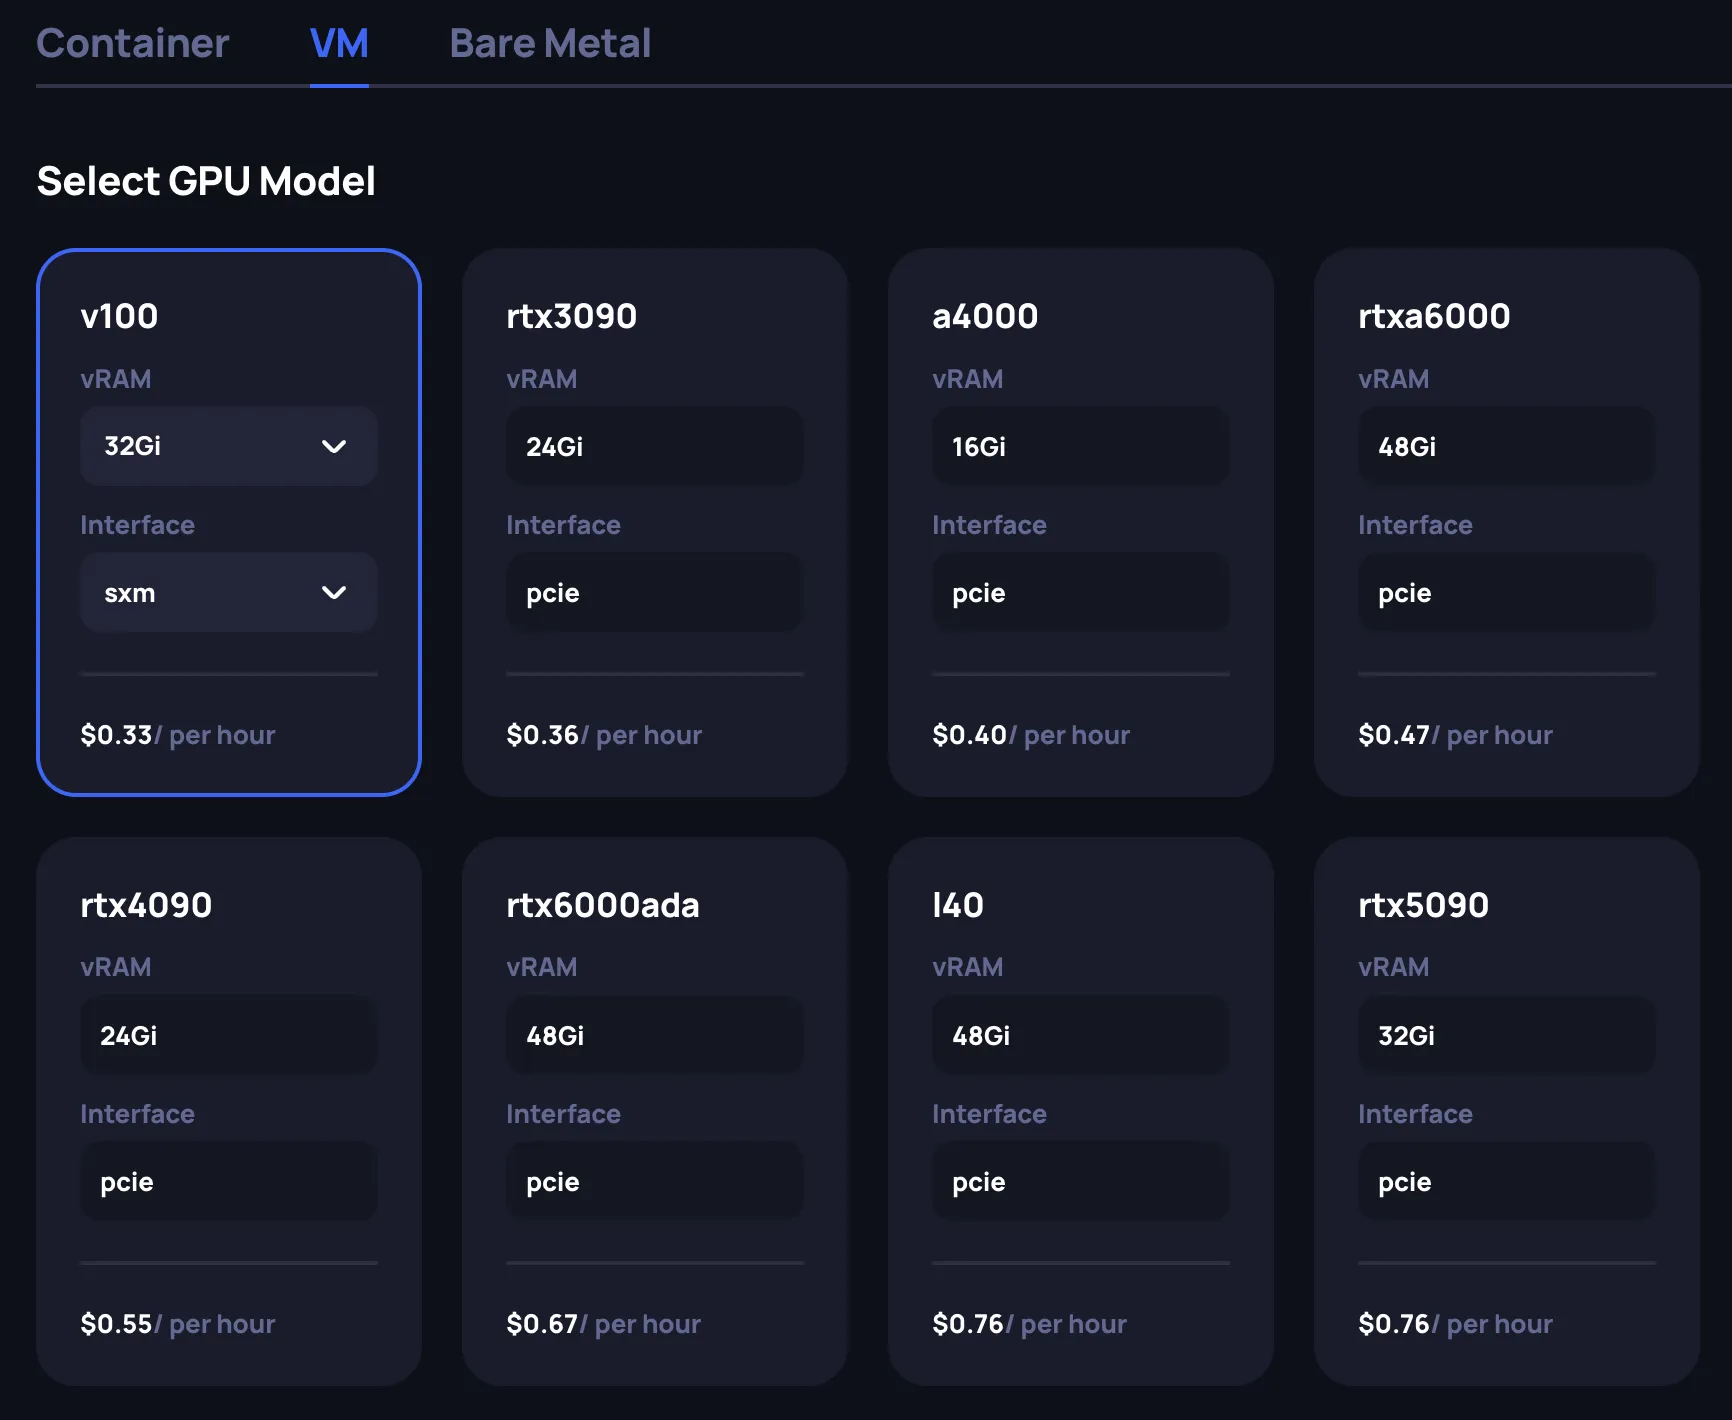
Select the GPU model
At the top of the page, select the VM or Bare Metal tab. Then choose the GPU model that fits your workload requirements. Each GPU card displays key specifications:
- vRAM: GPU memory available. Some GPU models offer multiple vRAM options — use the dropdown on the card to select the desired variant.
- Interface: Connection type (PCIe or SXM). Some GPU models support both — use the dropdown to choose. SXM offers higher memory bandwidth and is typically used for multi-GPU training workloads.
- Price: Minimum hourly rate in USD across all available configurations for this GPU model
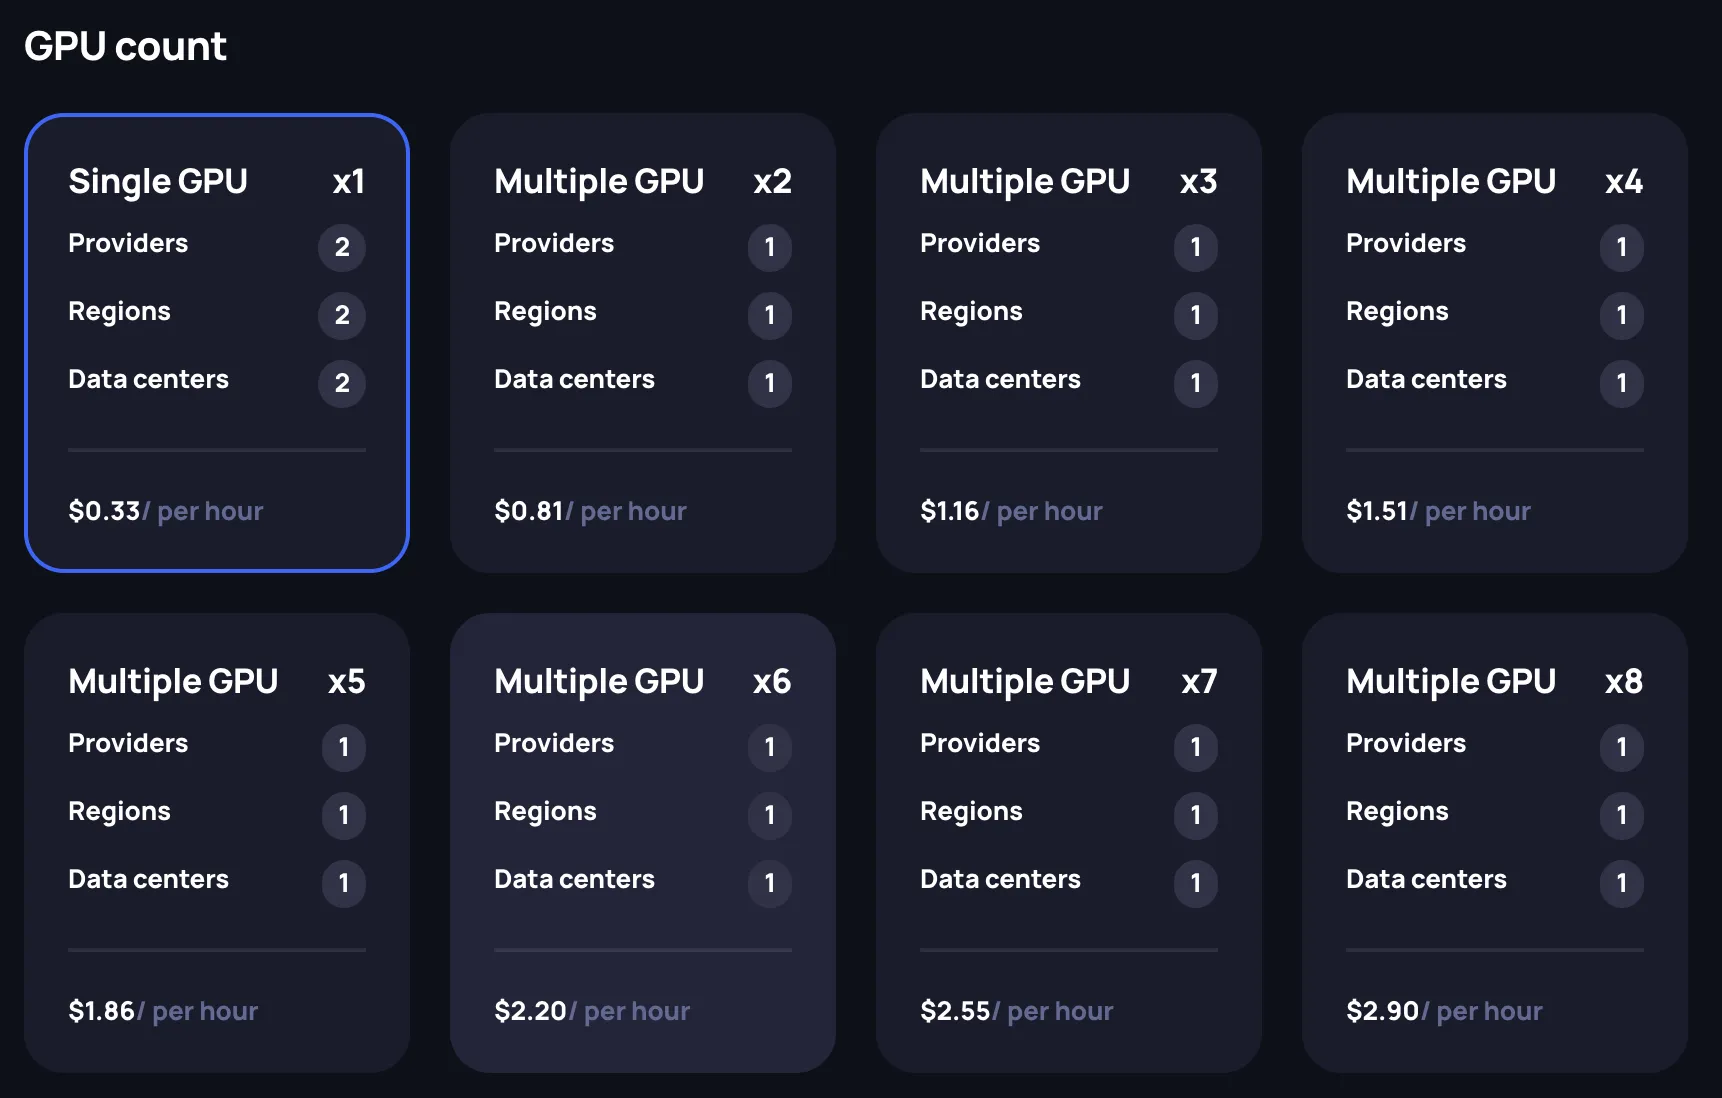
Select the GPU count
Choose how many GPUs you need for your instance. Available options range from a Single GPU (x1) to Multiple GPU configurations. Each card shows:
- Providers: Number of providers with this GPU count available
- Regions: Number of regions where this configuration is offered
- Data centers: Number of data centers with availability
- Price: Hourly rate for the selected GPU count
Multi-GPU configurations are useful for distributed training, large model inference, or other workloads that benefit from parallel GPU compute.
Select a configuration
After selecting the GPU model and count, choose a specific configuration from the available offerings. Each row in the configuration table shows:
- GPU: The GPU model
- Location: Data center location
- Provider: The compute provider
- vCPU: Number of virtual CPU cores allocated
- RAM: System memory allocated
- Storage: Disk space allocated
- Price: Hourly rate
Select the row that matches your requirements. The Review panel on the right updates to reflect your selection.

Specify the instance name
In the Configure deployment section, provide a name for your instance in the Basic Information field. A random name is generated by default, but you can customize it.

Set the OS image
Choose the OS image for your instance using the Set Image dropdown. Available images come pre-configured with CUDA drivers and GPU support. Select the image that matches your software requirements.

Select SSH keys
Choose which SSH keys should have access to the instance. Your registered keys are listed with their name and fingerprint. Use the X button to remove a key from the selection, or click the dropdown chevron to expand key details. Click Add New Key to register a new SSH key if needed.
You need at least one SSH key registered to access your instance. SSH keys can be managed in Settings.

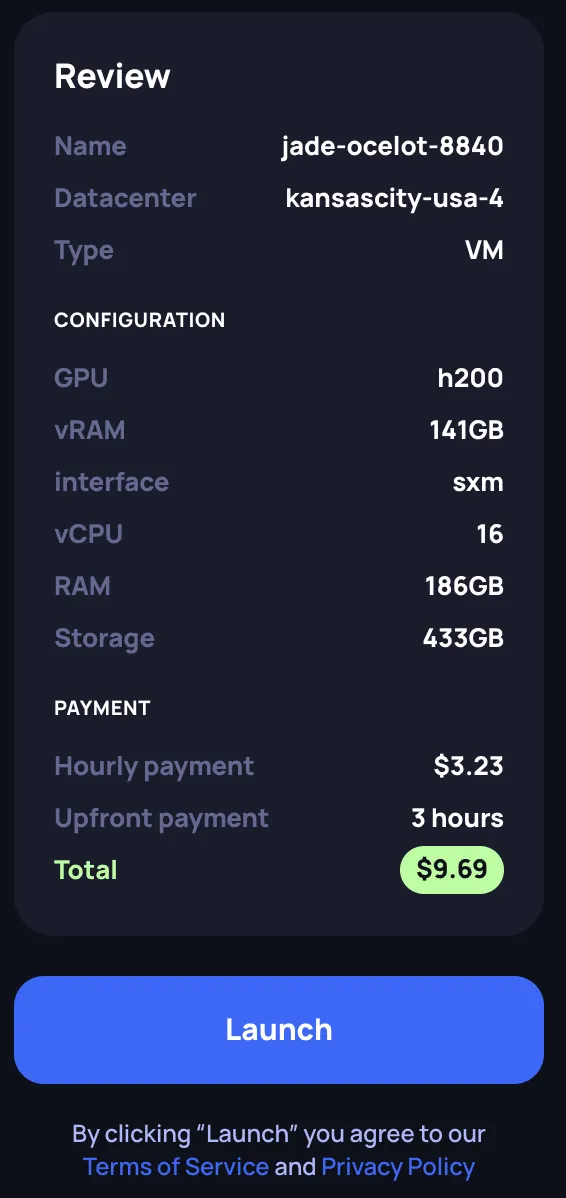
Review and launch
Review your configuration in the Review panel on the right side. Verify:
- Name and Datacenter location
- Type: VM or Bare Metal
- Configuration: GPU model, vRAM, interface, vCPU, RAM, Storage
- Payment: Hourly payment rate, upfront payment (3 hours), and total amount to be deducted
Click Launch to deploy your instance. You will be redirected to the Instances page where you can monitor the deployment status.